What materials block radio waves most effectively?

. dimanche 22 février 2009
View Comments

How Do Different Obstacles Affect Radio Waves?

Ross .S

SOAR 6th 1998

PURPOSE

The purpose of this experiment was to find out which materials block radio waves and thus cause the most interference for remote control devices.

I became interested in this idea because I wanted to know what objects I have in my house that would cause interference to my R/C car.

The information gained from this experiment will help if someone is using remote control robotics or devices. It may be useful for scientific reasons, remote exploration as well as recreation. This experiment will benefit all those by determining which materials a R/C car user should avoid transmitting through.

HYPOTHESIS

My hypothesis is that the cement (brick) will give the least interference and that the glass will have the most interference.

I base my hypothesis on a book series called Elements; the AEE homepage and an encyclopedia called Science & Technology. I also base my hypothesis on my own educated guess that glass has very compressed molecules and a reflective surface, and brick has cracks and spaced out molecules.

EXPERIMENT DESIGN

The constants in this study were:

The obstacle used to obstruct the radio wave

The distance for the radio wave to travel

The distance for the car (receiver) to travel

The amount of time it took the car to travel from the beginning court to half court

The manipulated variable was the amount of time it took the radio wave to pierce the obstacle (the wood, glass and brick). Then hit the receiver and cause the remote control car to move and then hit the centerline at half court.

The responding variable was the amount of time it took the car to start up from the beginning court line to then drive and arrive at the half court line.

To measure the responding variable I used a stopwatch to determine how much time it took the car to go from the beginning of the basketball court to the center of the basketball court.

MATERIALS

QUANTITY ITEM DESCRIPTION *C/A= Commonly Available

*C/A Cement (brick)

*C/A Wood

*C/A Glass

1 Stop-watch

1 27 MHz remote control car

24 AA alkaline batteries OR batteries

6 9v batteries OR

1 rechargeable 9v batteries

PROCEDURES

1. Place remote control car's (receiver) back wheals on the very edge of the beginning line of the basketball court.

2. Get someone (friend, family) to hold the remote control (transmitter) and stand outside the door of the gymnasium.

3. Have stopwatch set to proper setting.

4. Get to eye level with the mid-court centerline or where the car will stop.

5. Shout out a signal, like "GO!" then immediately start the stopwatch.

6. When the car touches the beginning on the mid-court line stop the stopwatch and give a signal to stop, like "STOP!"

7A. Place 4 new AA alkaline batteries in car OR

7B. Recharge 4 AA alkaline batteries from car then replace.

8A. Place 1 new 9v battery in remote control OR

8B. Recharge 1 9v battery then replace.

9. Close the door of gymnasium, with assistant remaining behind the door, to give you the material of glass.

10. Repeat steps 1 - 8B; be sure to replace step 2 with step 9.

11. Have assistant stand behind the boy's locker room wall to give the material of cement.

12. Repeat steps 1 - 8B; once again replace step 2 with step 11.

13. Have assistant stand outside the closed wooden door (separating the transmitter from the receiver) to give material of wood.

14. Repeat steps 1 - 8B; replace step 2 with step 13.

15. Repeat all steps (including steps 11 and 13) at least once more to confirm previous results.

RESEARCH REPORT

INTRODUCTION

My project is called, "How Do Different Obstacles Affect Radio Waves?". I learned about the different types of radio waves, and also learned about their many uses.

Types of Radio Waves

There is a large amount and Varity of radio waves, the two most radio waves would have to be AM and FM. AM (Amplitude Modulation) transmits by being transmitted into the air, it is bounced of the ionosphere and then reflected back to an antenna of a radio or other receiver. Unfortunately, this makes the radio wave more prone to interference like lightning or interference by other radio waves. FM (Frequency Modulation) is sent on a ground wave. This ground wave spreads out across the ground to reach radios. Sometimes when you drive in hilly areas, the FM wave is blocked out and the signal becomes mixed with static. The FM radio wave cannot be reflected off the ionosphere because the signal pierces through the earth's atmosphere and travels through space.

Uses of Radio Waves

The uses of radio waves are vast and extreme. One use, being the most obvious, is entertainment. The standard AM FM radio can cover 53-171 kHz with FM and 88-108 MHz is used by AM. A TV uses both AM and FM to broadcast their signals to televisions all over the world. One other popular use is recreation. Remote control models are a common hobby, whether you build them or just by ones to race others. Remote control models/toys are usually brodcasted on frequencies from 1-80 MHz. \par Another use is the exploration of space. A radio telescope uses FM signals to send out in space to record the distance of objects. When the signal hits something, it bounces back and is recorded on a computer. The radio wave can be used to explore the earth too. Small remotely controlled, unmanned submarines have been sent to the depths of the oceans with cameras to record things that would be extremely expensive find out. Remote controlled robots on land can be sent into volcanoes or other hostile environments to gather information. \par The largest and most important use is communication. Walkie-talkies are used by policemen, firemen, the army and some have even been made for a more kind of family use. A more recreational communication is HAM radio; HAM radio is a sort of amateur radio. Although many of the people who use it are far from amateur for they can reach people all across the globe.

The Basics of an R/C Car

The more common toy-type remote control car uses the same frequencies as other more model-type cars. The two frequencies made most available by the toy-type R/C's are 27 MHz and 49 MHz. The common toy-type R/C uses a simple kind of direct radio wave. When you press a button or move a lever on the transmitter, it sends a precise signal to one of the R/C car's many carefully tuned servos. The common car uses a rather simple motor that is battery powered. The model car is almost the same as the common one. With the exception that their motors are much more advance and can even be gasoline powered. Also, the advance car may have more controls, thus having more servos.

SUMMERY

The two main radio waves are AM and FM. Radio waves are used for communication, recreation, the exploration of space and the exploration of our earth. A remote control car usually will use a simple radio wave transmitted by the controls to function.

RESULTS

The original purpose of this experiment was to see which materials, out of wood cement and glass, conducted the most interference against radio waves. Hopefully the materials would cause the loss of speed in the car (receiver).

The results of the experiment were surprising. I was a little unhappy with how the accuracy of the experiment was. For example the car did not always go completely straight due to the crude way of having to align the car's wheels with the simple line on the basketball court. Another example would probable be the amount of hesitation that was present, even being off by about a hundredth or tenth of a second would have to be noted. I believe that the start of the stopwatch and the starting of the car were not started right on the mark.

See the table and graph below.

CONCLUSION

My hypothesis was incorrect. The wood offered the most interference, and then the glass and the brick offered the least interference to the radio waves. The results indicate that this hypothesis should be rejected. I thought that the glass would have the biggest results on the radio waves, but in actuality the wood offered more interference and the brick offered the least.

Because of the results of this experiment, I wonder if the way I chose to measure the material's interference on the radio waves was the best choice. If I were to conduct this project again I would definitely rethink the choice of car and choice of experiment on the radio waves.

How to make your own telegraph machine.

.
View Comments

Talk By Lightning Telegraph
Talk By Lightning Telegraph Intro

Dot-dot-dot-dot; dot; dot-dash-dot-dot; dot-dash-dot-dot; dash-dash-dash. That’s Morse Code for hello. Named after the American inventor Samuel Morse, Morse code is a system of short dots and longer dashes which represent the letters of the alphabet. Signals are sent by starting and stopping the flow of electricity through a wire.
You can make your own telegraph for sending secret messages to a friend. This project may require a trip to the store, some patience, and maybe a bit of help, but it's well worth it. After connecting all your wires and buzzers, you'll be able to “talk by lightning” (as telegraphy was once called).

Materials

• two pieces of cardboard approximately 20 cm x 10 cm
• two pieces of cardboard approximately 3 cm x 8 cm
• three pieces of wire approximately 19 cm long
• three long pieces of wire (see note)
• one new "D" cell battery
• four thumbtacks
• two lights (see notes)
• wire strippers (or scissors)
• pliers
• tape

Notes
If you want to build this project so you can communicate with a friend/brother/sister in another room, the three long pieces of wire need to be long enough to reach that room. You can also build the telegraph with shorter wires and then replace them with longer wires later.
The lights can be replaced by buzzers or light emitting diodes (LEDs: semiconductors which glow when electricity flows through them; used as power indicators on computers and other electronic gadgets.) All of these are inexpensive and available from Radio Shack or similar electronics stores. The “D” cell battery used in this project is 1.5 volts so it’s important to buy compatible 1.5 volt LEDs, buzzers, or lights (we used a 2.37 volt light bulb which worked fine). If they are not available, don’t worry, you can simply tape two batteries together. Of course, you can mix-and-match: use a buzzer in one room and a light in the other.
Buzzers and LEDs only work if the electricity flows in the correct direction. So you have to pay close attention when connecting them. On the buzzer, the red wire indicates the positive side, and the black wire indicates the negative side. On a LED, the long side usually means positive. You can also look to see if one side has a flat spot. If it does, that is the negative side. The circuit diagram below shows the positive and negative connections.

Talk By Lightning Telegraph Material


Instructions

1. Using wire strippers or scissors, remove about 1.5 cm of the plastic insulation from the ends of each piece of wire.
2. We will need to distinguish between the three long pieces of wire. The easiest way to do this is to put a piece of tape on each and letter one A, one B, and one C.

Talk By Lightning Telegraph Instructions 1
3. Put a bend in each of the two small pieces of cardboard about 2 cm from one end. Tape these pieces to the right side of the larger cardboard pieces. These will be the switches.
4. Tape the battery to the centre of one of the large pieces of cardboard. The positive (knobby) side should be positioned as in the photograph.

Talk By Lightning Telegraph Instructions 2
5. Tape two of the short wires to the negative (flat) side of the battery. It’s important to make sure the metal from the wire is making contact with the metal part of the battery.
6. Push a tack through the larger piece of cardboard right underneath the cardboard switch.
7. Make a loop in the free end of one of the pieces of wire taped to the battery and hook it around the tack. Use pliers to bend the tack over on the other side of the cardboard so the wire won't slip out.
8. Tape the buzzer to the other side of the large piece of cardboard.
9. Twist the free end of the second wire to the buzzer’s black wire. Make sure the metal parts are touching one another. It’s also a good idea to wrap tape around the twist to make sure it doesn’t come apart.

Talk By Lightning Telegraph Instructions 3
10. Push a tack up through the underside of the cardboard switch. When you push the switch down, the two tacks must touch.
11. Put a loop in one end of wire A, and hook it around the tack. Use pliers to bend the tack as before.
12. Tape one end of wire B to the positive (knobby) end of the battery. Remember the metal of the wire must touch the metal on the battery.
13. Twist one end of wire C to the red buzzer wire. Wrap tape around the twist.

Talk By Lightning Telegraph Instructions 4
14. Push a tack through the second large cardboard piece below the free end of the cardboard switch. Put a loop in the free end of wire B and one end of the remaining short wire. Hook both wires around the tack. Use pliers to bend the tack back.
15. Tape the light to the other side of the piece of cardboard as shown.
16. Attach the free end of the short wire to the light.

Talk By Lightning Telegraph Instructions 5
17. Attach the free end of wire A to the other side of the light.
18. Push a tack up through the underside of the cardboard switch. When you push the switch down, the two tacks must touch.
19. Put a loop in the free end of wire C, and hook it around the tack. Bend the tack back.

That’s it. Pushing down on the switches completes the electric circuit and turns on the light (or sounds the buzzer)
on the other piece of cardboard. If it doesn't work, check your connections: wire has to be touching wire (or tack)
at each connection. If it still doesn't work, try pushing the wires more firmly against the ends of the battery.

One final note. If you are using LEDs, you may find them hard to connect to the wires. The photo below shows
one easy way.

Talk By Lightning Telegraph Instructions 6

Morse Code
To send a dot, press down and immediately release the switch. A dash lasts three times as long as a dot. A space between letters is the same length as a dot; a space between words is the same length as a dash.

A .-
B -...
C -.-.
D -..
E .
F ..-.
G - -.
H ....
I ..
J .- - -
K -.-
L .-..
M - -
N -.
O - - -
P .- -.
Q - -.-
R .-.
S ...
T -
U ..-
V ...-
W .- -
X -..-
Y -.- -
Z - -..
Period .-.-.-
Comma - -..- -
Out .-.-. (message done)

How to make a crystal radio detector

.
View Comments

Foxhole Radios
by Don Adamson

If you appreciate ingenuity, simplicity, and like instant gratification from your radio projects, then you ought to spend a few minutes building your own foxhole radio.
Foxhole radios were built by GIs in World War II from materials they had easy access to in the field. They usually consist of just a coil and a detector. They use a point detector, the chief component being an ordinary razor blade.
Justin Garton wrote a letter to the editor of QST, printed in the October 1944 issue:

Here is some more information on the foxhole radio sets used by the boys on the Anzio beachhead. In the daytime they could receive stations from Rome and at night Nazi propaganda "jive" programs from Berlin. Here is the diagram:

In the "Strays" section of QST for July, 1944, another mention is made of the razor blade foxhole radio:

According to Toivo Kujanpaa, a licensed ham op stationed on the Anzio Beachhead, several of the radio men there rigged up a field version of a "crystal" set using a razor blade for a detector. Their efforts were rewarded by the reception of a "jive" program (along with some German propaganda) aimed at the American forces from an Axis station in Rome.

Note the simplicity of the design. Parts were assembled on a piece of wood, usually held in place with thumbtacks. The safety pin is anchored at one end and placed so the point may be moved around on the surface of the razor blade. According to an article in Popular Mechanics of October, 1944, the blued steel surface of the blade gives the rectifying action needed for detection without crystals.
Someone soon figured out a better way to use the razor blade detector: use a pencil lead point on the razor blade (Mr. Garton attributes this innovation to a ham in New York).
I built a foxhole radio in a few minutes using the previous diagram, but I used a pencil point. I fashioned a safety pin shape out of stiff wire, then tied about an inch of pencil lead to it with finer wire. The radio worked the first time I tried it. Of course, with a fixed coil I received only one station.

The design below came from a submission by Lt. Paul M. Cornell in the September, 1945 issue of QST; he used it in the South Pacific. The photograph shows a similar radio built by Don Menning; he simply stuck the whole tip of a pencil on the end of the safety pin.

Here is the parts list for the schematic based on Lt. Cornell's submission:

(A) Antenna connection. This nail also fastens the coil form to the baseboard.

(B) Baseboard. 4 inches square, ¼ inch thick.

(C) Coil form. Wood block, 3¾ inches long, 2 inches wide and ¼ inch thick.

(D) Area of coil scraped clean along arc of switch arm.

(G) Ground connection. This nail also fastens coil form to baseboard.

(J) Jacks for 'phones. Paper clips held down by tacks.

(P) Detector. Pencil lead wrapped with copper wire and resting lightly on razor blade. Some adjustment of the location and pressure of the lead on the blade may be required.

(R) Razor blade held down and connected to wire by tack.

(S) Screw or nail for pivot of switch arm.

(SA) Switch arm made from paper clip.

(T) Thumbtack, or any kind of tack.

(W) Coil winding, approximately 175 turns No. 26 insulated wire.

In October of 1962, Popular Mechanics ran a construction article by Joe Tartas which was almost identical to the above design. Mr. Tartas noted that GIs used their bayonets buried to the hilt in moist earth for a ground connection. You probably do not want to use your vintage WWII bayonet in this manner unless you're a stickler for authenticity!
As with any radio of this type, a good ground and a long antenna (50 to 100 feet) will give you best results. Don't expect room-filling sound, but do expect a lot of fun from very little effort!
The only part of a foxhole radio you don't build from scratch is the 'phone. However, if you're really looking for a radio project built entirely from scratch, you could try your hand at building one.
If you take apart a 'phone, you'll notice they're very simple in construction. Basically, there's a coil with a small iron core. Electrical variations in this coil generate a magnetic field used to attract and repel a metal plate. This vibrating plate produces the (faint) sound you hear.
The March 1, 1994 issue of The Xtal Set Society Newsletter carried an article by Nyle Steiner describing how to build your own home-brew 'phone. Nyle used a coil made from 7000 turns of 0.004 inch wire around a ¼ inch rod. For more information, check out this article, or experiment on your own!

Disclaimer: Working with antennas and electrical devices (especially old ones) can be dangerous, and mistakes can be fatal. If you decide to work with such things, it is solely your responsibility to work safely and to know what you're doing. -DJA

How to make a battery using the human body!

.
View Comments

A Human Battery

In a nutshell, a battery uses a chemical reaction to produce an electrical current. In this experiment, we will create an electric current using nothing more than our own bodies (Reeko promises this won't hurt.... much).

  1. Mount the copper and aluminum metal plates to two separate pieces of wood.
  2. Connect one plate to one of the DC microammeter's terminals using an alligator clip and the hookup wire. Connect the other plate to the second terminal. A DC microammeter, which is an instrument that measures the electric current in a circuit, can be purchased from your local Radio Shack store.
  3. Now place one hand on each plate.

You should see an electric current generated on the meter. If you don't see a reading then simply reverse the connections. If you still don't see a reading then you may need to clean the metal plates (or get a pair of better reading glasses).

When you place your hands on the metal plates, a thin film of sweat on your hands acts just like the acid in a battery, producing a chemical reaction with the copper plate and a chemical reaction with the aluminum plate. Your hand actually takes negatively charged electrons away from the copper plate (leaving positive charges behind) and gives electrons to the aluminum plate (causing it to become negatively charged). This difference in charges produces an electrical current which flows through the meter.

  1. Wet both hands.
  2. Once again, place one hand on each plate.

Metals are very efficient at this electrical current we have created. Your body resists the flow of current (through the skin). When you wet your hands you greatly decrease the resistance and thus increase the current giving you a higher reading on the meter.

Parent's Note. Batterys have actually been around a lot longer than you'd think. The first practical battery was probably developed by Count Alessandro Volta, an Italian scientist, in the late 1790's. Volta's invention became known as a voltaic pile. It consisted of a stack of pairs of silver and zinc disks. The pairs were separated from one another by disks of cardboard moistened with a salt solution.

In 1836, John F. Daniell, an English chemist, introduced a more efficient primary cell. The Daniell cell had two liquid electrolytes and produced a steadier current than Volta's device. In 1859, the French physicist Gaston Plante invented the first secondary battery, the lead-acid storage battery. During the 1860's, another French scientist, Georges Leclanche, invented a type of primary cell from which the modern dry cell was developed.

Through the years, scientists have designed smaller but increasingly powerful batteries for the growing number of portable electric devices. For example, a lithium cell is so tiny that it is often called a button battery. But it produces voltages higher than any other single cell. It uses lithium metal as the negative electrode and any one of several oxidizing agents as the positive electrode. Lithium cells are used mainly in calculators, cameras, pacemakers, and watches.

How to generate enough static electricity to create sparks

.
View Comments

Making Sparks Click to get puzzle piece!

In this experiment we'll create an object called a electrophorus. Using the materials listed above, we'll charge the object and then discharge it creating a snap, a little electrical shock, and a bright spark. If you're afraid of a little electrical shock then get Dad to discharge the object for you. And for grins, don't tell Dad beforehand about the resulting spark and shock. After all the amateur garage projects Dad has worked on, he's bound to be used to electrical shocks by now...

  1. Use the pliers to remove the pen cartridge from the insides of the BIC pen. This will be our 'handle'.
  2. Place the pie pan upside down on the table.
  3. Push a thumbtack down through the center of the pie pan.
  4. Turn the pan back over so you are looking at the inside of the pan. The point of the thumbtack should be sticking up through the middle of the pan.
  5. Coat the thumbtack point with hot glue. Reeko's sure you figured out that the word 'hot glue' comes from the fact that the glue is HOT! So be careful.
  6. Push the bottom of pen body down onto the extending thumbtack point. You could also use a pencil for this step and press the eraser end of the pencil down onto the thumbtack.
  7. Let the glue dry for a little while.
  8. Rub the styrofoam plate with the wool rag for about 45 seconds.
  9. Place a styrofoam plate upside down on the table.
  10. Using the pen 'handle' that we just created, place the pie pan on top of the upside down styrofoam plate (the pen should be sticking up).
  11. Quickly touch the pie pan with your finger. It may produce a small shock.
  12. Remove the pie pan off of the styrofoam plate using the pen 'handle'.
  13. Discharge the 'charged' pie pan by touching it with your finger. If you feel mildly unpleasant about the small electrical shock then use Dad as the discharge object. Foreheads and ears make good targets - just make sure you have an escape route planned beforehand.

Pretty cool, huh? You can recharge the pan by starting at step 8. After Dad has seen (or felt) the results of this experiment, feel free to have a little fun and chase him around the room with your newly built zapper.

So what have we learned here (besides the fact that Dad's can indeed glow in the dark)? Rubbing the styrofoam plate with the wool rag creates a negative charge on the plate (that is, it attracts electrons from the wool). When you place the pie pan on top of the styrofoam, the electrons on the styrofoam repel the electrons on the pan. The pan at this point has a neutral charge. But when you touch the pan (while it is on the styrofoam plate) the electrons travel off of the pan and onto your finger (possibly creating a spark). Now the pan has a positive charge (it was charged by induction).

Now, by carrying this contraption by the insulated handle (the pen), you can carry a positive charge all around the room. When you bring this positive charge near your finger, or any other object that is a source of electrons, the positively charged pan will attract electrons, creating a spark.

Parent's Note. Although an atom is normally electrically neutral, it can lose or gain a few electrons in some chemical reactions or in a collision with an electron or another atom. This gain or loss of electrons produces an electrically charged atom called an ion. An atom that loses electrons becomes a positive ion, and an atom that gains electrons becomes a negative ion. The gain or loss of electrons is called ionization.

How to build an extremely sensitive electroscope for detecting static electricity

.
View Comments

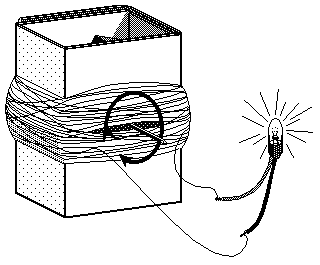
RIDICULOUSLY SENSITIVE CHARGE DETECTOR


[SCHEMATIC OF DEVICE] (The earth-ground is not required.)

(The 1-Meg resistor is not required.)


This simple circuit can detect the invisible fields of voltage which surround all electrified objects. It acts as an electronic "electroscope."

Regular foil-leaf electroscopes deal with electrostatic potentials in the range of many hundreds or thousands of volts. This device can detect one volt. Its sensitivity is ridiculously high. Since "static electricity" in our environment is actually a matter of high voltage, this device can sense those high-voltage charged objects at a great distance. On a low-humidity day and with a 1/2 meter antenna wire, its little LED-light will respond strongly when someone combs their hair at a distance of five meters or more. If a metal object is lifted up upon a non-conductive support and touched to the sensor wire, the sensor can detect whether that object has an electrostatic potential of as little as one volt!

  • Note: I use the term "electrification" rather than "charging", in order to avoid confusion between charge and net-charge. Charge is the stuff on the negative electrons and positive protons, while net-charge is the imbalance between positive and negative particles which appears on everyday objects. Realworld objects become "electrified" whenever their pre-existing + and - charges are not equal.

PARTS LIST:

  • 1 - Standard 9-volt battery
  • 1 - MPF-102 N-channel Field Effect Transistor (FET) Radio Shack #276-2062
  • 1 - Red Light Emitting Diode (LED) Radio Shack #276-041
  • MISC:
    • Battery connector (#270-325)
    • Alligator Clip Leads (#278-1156)
    • solder, if desired
    • 1-meg resistor (not required)
    • plastic, fur, foil, comb, tape dispenser, plastic cup
[Drawing: FET and LED soldered to 9v connector]
(Tiny version bult atop a 9v battery connector)

Shortcuts:

    • 1.CONSTRUCTION HINTS
    • 2. SENSE E-FIELDS
    • 3. SENSE POSITIVE ELECTRIFICATION
    • 4. CHARGE IS CONSERVED
    • 5. PEELING CAUSES ELECTRIFICATION
    • 6. JUMPING ELECTRONS, "VOICE CONTROL"
    • 7. VARIABLE GAIN
    • 8. FIELD DISTORTIONS
    • 9. VANDEGRAAFF SENSING
    • 10. HOMEMADE CAPACITORS
    • 11. DIPOLE ANTENNA
    • 12. THE SKY VOLTAGE
    • 13. UNTESTED SUGGESTIONS
    • 14. HOW IT WORKS
    • 15. FET-PANEL MUSEUM EXHIBIT
    • 16. OTHER LINKS

CONSTRUCTION HINTS

Warning: don't connect the battery until you are SURE you've hooked everything up exactly right. It's possible to burn out the FET or the LED if they are connected incorrectly. Don't let the transistor's wires bump together even briefly, or it will flash the LED and burn it out.

NOTE: Don't ever connect any LED directly to a 9-volt battery, it will burn out the LED. Without the transistor to limit the current, a bare LED needs a 1000-ohm resistor wired in series if connected to the 9-volt battery.

Warning: Avoid touching the Gate wire of the FET. Any small sparks jumping from your finger to the Gate wire can damage the transistor internally.

The 1-meg resistor helps protect the FET from being harmed by any accidental sparks to its Gate lead. The circuit will work fine without this resistor. Just don't intentionally "zap" the Gate wire.

To test the circuit, charge up a pen or a comb on your hair, then wave it close to the little "antenna" wire. The LED should go dark. When you remove the electrified pen or comb, the LED should light up again.

IF IT DOESN'T WORK, the humidity might be too high. Or, your LED might be wired backwards, or the transistor is connected wrong, or maybe your transistor is burned out. Make sure that the transistor is connected similar to the little drawing above. Also, if the polarity of the LED is reversed, the LED will not light up. Try changing the connections to your LED to reverse their order, then connect the battery and test the circuit again. If you suspect that humidity is very high, test this by rubbing a balloon or a plastic object upon your arm. If the balloon does not attract your arm hairs, humidity is too high.


SENSE E-FIELDS

Connect the circuit to its battery, and the LED will turn on. Comb your hair, then hold the comb near the Field Effect Transistor (FET) gate wire. The LED will go dark. This indicates that the comb has an excess of negative charge, and the FET responds to the electrostatic field surrounding the comb. It acts as a switch and turns off. Remove the comb and the LED brightens again. Wiggle the comb, and find at how great a distance the circuit still detects it. It's amazing how far an e-field extends around an electrified object. (But then, e-fields should extend to infinity, no?)

On a very low-humidity winter day the circuit will respond at a much greater distance. This happens because, when humidity is low, the combing of your hair then generates a much stronger separation of charge upon the comb's surface. Note that a metal comb will not work, since any separated charge immediately weakens by spreading to your hand and across your whole body. A plastic or hard rubber comb works well because rubber is an insulator and the imbalanced charge can't leak off the comb.

Try simply TOUCHING a plastic pen briefly to hair. The FET will detect even this tiny negative net-charge on the pen. The sensor will usually not indicate the equal positive that appears on your hair, since hair is made conductive by humidity, and the positive net-charge leaks to your head. The polarity of the surface charge on the comb or plastic pen is negative. The rule for this FET is, negative charge turns the switch (and the LED) off.

SENSE POSITIVE ELECTRIFICATION

This FET sensor is not an ideal educational device because it responds differently to positive than to negative. Create some positive net-charge by affixing a small tuft of hair or wool to the end of a plastic object (pen or ruler), then rub the hair upon another plastic object. (If we electrify some hair, we can avoid leakage losses by not touching it with fingers or other grounded object.) Bring the positively-electrified hair near the FET. Note that the LED becomes brighter, but when the hair is removed, the LED goes dark and stays that way. Bring the hair close by again, and the LED lights up again. Rules for this FET:

  • negative objects turn the LED off, it lights again when removed.
  • positive objects make the LED bright, then dark when removed.
Turn the LED back on by simultaneously touching fingers to the "Gate" wire and to some other part of the circuit. Or, touch a plastic pen to some hair, then wave it near the sensor, and the LED will light up. Remember this trick when doing other demonstrations. (Note: professional electrometers do not suffer from this "reset" effect, but professional electrometers cost several hundred dollars at the very least!)

CHARGE IS CONSERVED

Mount a tuft of hair on a plastic rod, verify that it is completely discharged and does not affect the FET. Take a second plastic rod (or plastic pen!) and verify that it is also completely neutral. (Fondle the whole pen with slightly damp hands if not.) Now hold the plastic handle and touch the hair-tuft to the tip of the pen, separate them, then hold them up to the sensor one at a time. You'll discover that the end of the plastic pen is now negative and turns the LED momentarily off. The hair tuft is positive and turns the LED on, then off.

Contact between the hair and the plastic caused some assymetrical sharing of the equal positive and negative "electricity" within them. When they separated, some negative charges stayed with the plastic, leaving it with more negatives than positive (net negative charge.) At the same time, the hair was left with fewer negatives than positives, for a net positive charge. Atoms were torn apart, "ionized", and pairs of electrons and protons were yanked apart and separated to vast distances. Note: "static electricity" is not caused by friction, it is caused by contact between dissimilar materials, followed by separation. We could say that it's caused by "peeling".

PEELING CAUSES ELECTRIFICATION

The "peeling" effect can be demonstrated with a roll of plastic adhesive tape. Peel a few inches of tape off the roll and hold it near the circuit. The LED will show that the tape is strongly electrified. Now use the sensor to test the tape dispenser. You will discover that the roll of tape has an opposite polarity compared to the strip of tape. This illustrates that "static" electrification does not require friction, it only requires intimate large-area contact between dissimilar materials.

Matter is made of positive and negative charge, and the peeling of tape can separate the charges that were already there in the matter. Because the plastic backing of the tape is a different material than the adhesive, when they touch together there is assymetric bonding and electron-sharing. This leads to separation of opposite charge when we peel tape from its roll. Also, try taking two strips of tape, stick them back to front (fold little tabs so you can separate them again,) pat them down with moist hands to discharge them, then peel them apart. Hold each near the sensor. One strip indicates strongly positive, the other is equally negative. The strips will attract each other. Try other demonstrations from Sticky Electrostatics, using the Charge Detector to show polarity of various parts of the tape.

[NOTE: people have found that "Scotch" brand tape doesn't work as well for the above activity. It contains some chemicals that prevent electrification. Use some other, inexpensive brand of tape instead.]

JUMPING ELECTRONS, "VOICE CONTROL"

If you build a tiny compact version of the FET circuit (solder it to a torn-open battery connector), you can try the following trick. Hold the circuit in your hand, make sure the LED is lit, stand on a rug, then jump up and down. The LED will flash on and off. Walk around, and the same thing happens. As your shoe soles make contact with the rug and then peel away from it, your entire body becomes electrified. This makes the sensor respond. ANd when jumping, if you place your shoes back onto the oppositely electrified footprints, you cancel out the net charge and the sensor indicates another polarity change. Scuff your shoes, stomp up and down, jump around, and the sensor will flash wildly. Demonstrate to onlookers that the sensor does not respond when you shake it up and down, but it does respond when you jump. On a dry day, you can control the sensor with the tiniest motion: scuff one shoe, then lift the toe to turn the sensor on and off. Say "on", "off" while moving your toe, and you have a "voice control" magic trick. Let some poor fool examine the sensor, yell at it, etc. It will only respond to your voice! (grin!)

VARIABLE GAIN

Obtain a small capacitor with a value below 100 picofarads. Connect it between the FET gate lead and one of the other FET leads (doesn't matter which one.) This greatly reduces the sensitivity of the device. In situations where the sensor is TOO sensitive, this can make a big difference. Capacitors larger than 100pF can be used, they REALLY wipe out the sensitivity in inverse proportion to the capacitance value. The capacitor does this because it forms part of a circuit called a "Capacitive voltage divider," a sort of loudness control for invisible voltage fields.

Now make the circuit MORE sensitive. Obtain an alligator clip-lead, and connect it to the Gate lead of the FET. Let it hang loose without touching anything. You'll find that this has vastly increased the sensitivity of your FET circuit. On a dry day it will respond to hair-combing from 20ft away. If a TV screen is present, the sensor will act weird (especially when people walk between the screen and the sensor.) The clip lead acts as an antenna, and the longer it is, the more sensitive the FET circuit becomes.

FIELD DISTORTIONS

Electrify a plastic object, place it on an insulating support, place the FET sensor near it, then make sure the LED is turned on. If you now wave your hand near the object or the sensor, the LED will respond. Your hand causes the e-field around the object to distort and change. Even though your hand is not electrified, the FET responds. You've created a sort of "DC Radar" system which sends out a signal and then responds when nearby objects "reflect" the signal. Some types of industrial sensors ("proximity" or "capacitive" sensors) use this effect. Some burglar alarms do as well.

VANDEGRAAFF SENSING

See at what distance your FET electrometer can sense the e-field from an operating tabletop VandeGraaff electrostatic generator. Suddenly discharge the generator by using a grounded sphere electrode, and watch the distant FET respond. You are actually sending out radio waves with nearly zero frequency when you do this. The FET does not actually respond instantly, there is a speed-of-light delay (about one nanosecond per foot of distance.) It takes a short while for the wave of vanishing e-field to reach the sensor. Radio waves are simply propagating changes in electric fields, so your VDG machine and FET sensor constitute a simple radio transmitter and receiver.

HOMEMADE CAPACITORS

The FET circuit is so sensitive that it will detect the energy stored on a tiny homemade capacitor. Build a simple capacitor out of aluminum foil, styrofoam (from a coffee cup), and wires. Store energy in the capacitor by briefly connecting it to a 9V battery. Now touch one capacitor wire to the negative battery terminal of the FET circuit, and touch the other capacitor wire to the Gate terminal (avoid touching the wires with fingers, this will discharge the capacitor.) The LED will indicate the stored energy. Use the 9V battery to reverse the polarity of the capacitor, then test it again with the FET and note that the polarity is indeed backwards. Note: don't use paper for your capacitor dielectric, paper becomes slightly conductive when humidity gets high, and your stored energy will mysteriously vanish because the paper offers a leakage path so the separated charges can recombine. Another note: this experiment demonstrates that "static electricity" and battery circuits are the same. The FET detects the potential difference created by the 9V battery, just as it detects the much larger potentials in the space around electrified objects. It is not too far wrong to say that "static electricity" is simply "voltage." Everyday circuits are driven by the "static electricity" produced by their low voltage power supplies.

DIPOLE ANTENNA

After you use this FET device for awhile, you'll get the idea that it has just a single antenna terminal. However, like all voltmeters, it actually has two. The rest of the circuit acts as the other terminal. To demonstrate this, build a miniature version of the detector circuit onto the top of a 9V battery. If you hold the battery as usual, the Gate does act as the antenna, and negative objects make the LED go dark. Now carefully grasp the Gate wire between fingers and lift the whole device into the air. Avoid touching the battery. If you now hold a negatively electrified object near the battery, the LED will get brighter instead of dimmer. Polarity of operation has been reversed. If you lay the whole unit down upon an insulating surface and approach it with electrified objects, you'll find that the FET gate wire responds with one polarity, while the battery and the rest of the circuit responds with the other. Try connecting the gate wire to earth ground, then suspend the rest of circuit with an insulating handle. If you hold up objects having various polarities, you'll find that polarity of operation is opposite that of the gate wire.

'SCUSE ME, WHILE I SENSE THE SKY

All over the earth, thunderstorms are transporting negative charge downwards and positive charge upwards. As a result, the earth is electrified negatively everywhere, while the sky is positive. (Actually, it's the conductive ionosphere which is positive.) The FET sensor can detect this. Take it outdoors, away from trees or buildings. Hold it high in the air, then lower it to the ground while watching the LED. (Maybe get a tall adult to do this.) The LED will get darker when the device is lowered, and get brighter when it is raised up. The earth is negative! Maybe hang a cliplead antenna on the sensor wire to improve sensitivity. (This polarity reverses when there is a thunderstorm directly overhead, but I wouldn't suggest standing out in the open when there is a chance that lightning may strike!)

UNTESTED SUGGESTIONS

Here are a couple of things to try out. I haven't tested them, I don't know how well they work. You be first!

Electrify a large plastic object while no one sees, then have a group of people with FET charge detectors try to find which object in the room has the imbalanced charge.

Have everyone build FET electrometers. Line them all up in a row, electrify a plastic object, then sweep the object back and forth. You'll be able to "see" the electrostatic field that surrounds the object. Hold your hand near the row of detectors while standing on a rug. Jump up and down and see what happens.

Use a piece of cloth to create a small electrified spot on a plastic book cover. Use the FET device to find the spot. Draw an electrified shape using the cloth as a paintbrush, then see if you can use the sensor to figure out what the shape is.

Build many FETs and LEDs in a row on a wooden stick. Connect them all to one battery. Place a negatively electrified object on a table in a dimly lit room, then sweep the FET-stick rapidly past the object. Go back and forth really fast, and you should see a row of red lines caused by the moving LEDs. In the middle of the red lines will be a black splotch caused by the electrostatic field surrounding the negative object! Repeat this test, but this time use a bit of cloth to write the letter "A" on a plastic book cover in invisible, negative net-charge. Can you see the "A" when you sweep the stick back and forth? Mount your row of LEDs on some sort of motorized propeller, and you'll have an automated "charge detector disk."

HOW IT WORKS

A complete description of this device requires delving into the physics of solid state electronics. Instead, here is a quick description based on the fluid analogy for electric charge.

Metals act as conductors NOT because charge can pass through them. Instead, they are conductors because they contain charge which can move. Think of a metal wire as being like a hose that's aways full of water. And remember, vacuum is an insulator, even though it presents no barrier to charges.

The "sea of charge" in a metal is not compressible, and to remove even a tiny bit of it would take a huge amount of energy. In metals, each atom contributes one electron to an "electron sea", where the electrons don't stick to single atoms but instead orbit all throughout the material. If we could remove all the movable electrons from a metal, that metal would become an insulator. Unfortunately, removal of electrons from even the thinnest metal wire requires gazillions of Newtons of electrostatic force, and develops gazillions of volts of potential difference. ("Gazillions" means some huge number with way too many zeros!). Metals are conductive, and we can't easily change that.

This is where silicon comes in. While a metal's electron-stuff within acts like a dense fluid, the mobile charges in silicon act like a compressible gas. In silicon, only very few atoms contribute an electron to the "sea." In fact, the silicon doesn't really contribute electrons at all, and ultra-pure silicon is an insulator. Instead, only the impurities in the silicon contribute movable electrons. If we only put a gazillionth of a percent of impurities into the silicon mix, then the resulting material's movable electron-stuff becomes much more compressible than the "electron sea" within a metal. This reduces the voltage and force (by a gazillion times!) that is required to convert the material from a conductor to an insulator. The electron-sea of a metal is not very compressible. The electron-gas within silicon is very compressible.

So what? Well, if we can push the "electron sea" out of a conductor, we can change it into an insulator. It would be like turning off a switch, but almost no work is required to do it. Just apply an electrical "push" in the form of electrostatic repulsion, and large currents can be switched on and off.

The Field Effect Transistor is basically a tiny wafer of silicon with its edges connected to the Source and Drain leads, and the Gate lead connected to a metal plate layed upon the wafer. When the gate lead is electrified negative, it repels the electron-gas out of the silicon and converts it into an insulator. It acts like a switch that is turned off by pure voltage. If we picture the silicon as being like a rubber hose full of water, then the gate applies a sideways force which pinches the hose closed. Placing a negative net charge on the gate wire causes the "switch" to turn off and the LED to go dark. Merely holding a negatively electrified object near the Gate lead will apply a force to the electrons in that little lead wire, which pushes them into the metal plate, which repels away the electrons in the silicon, which pinches the conductive path closed.

Interesting part: it really takes no energy to turn off the FET. It does take electrostatic force, but force is not energy! And so, even a very distant object with a feeble net-charge can affect the FET and control the much larger energy directed to the LED.

The FET is not really turned off by negative net-charge. That is an overly simplified description. It is really turned off by a DIFFERENCE in the net-charge of the silicon and of the metal plate. You can either electrify the metal plate negatively, or electrify the silicon (and the battery, LED, and circuit wires) positively. Both will turn the FET off by pushing (or pulling) the electrons out of the silicon. Think of the rubber hose again: either you can squeeze it shut with fingers, or you can lower the pressure of the whole water circuit, and the hose will be collapsed by "suction" (by air pressure, actually.)

What are FETs good for? Well, most modern computers are constructed almost entirely from FETs. The megabytes of memory are formed from little grids of millions of microscopic FETs, each with a net-charge stored on its gate lead signifying a zero or a one. The processor chips are built of logic switches with Gate voltage as their input, and on/off switching as their output. Other things: super-FETs can be built which actually contain many thousands of small FETs hooked in parallel. These VFETs or HEXFETS are often used as the main transistors of large stereo amplifiers. A tiny vibrating voltage on their gate lead can route many amperes of sound-frequency charge flow through the loudspeakers, and a handful of FET wafers the size of your fingernail control the audio power for a whole rock concert.

How to build a wireless telegraph set

.
View Comments

BACKGROUND AND HISTORY OF TELEGRAPH AND WIRELESS TELEGRAPH:

Ever since the beginnings of time, people have been trying to communicate over distances greater than the human voice could reach. Early attempts included the use of smoke signals, signal fires, waving flags, and the moving arms of semaphores. Mirrors were also used to flash the image of the sun to distant observers.

After the discovery of electricity, wires were stretched from one point to another and an electric current was either allowed to flow through the wires or broken by a switch called a telegraph key. The electric current was first used to make marks on a paper tape and later, it was used activate a "sounder" which made clicking sounds. The short and long times between the clicks could be decoded into letters from the alphabet. This type of telegraph was called land-line telegraph because the wires crossed the land and used the ground as part of the electric circuit.

This revolutionary discovery allowed people to communicate instantly over distances that had required days or weeks for horse or train-carried messages. Telegraph stations were set up along railroads first because the right-of-way had already been cleared and it was easy to set up poles to carry the telegraph wires. Railroad dispatchers sent messages via telegraph to control the movement of trains and the wires also began to carry messages telling of news events and business transactions. It has been said that the "electric telegraph" was the most significant invention of the 19th century. At the very end of the 19th century, it became possible to communicate by telegraph without using wires. This 'wireless' telegraph system paved the way for all of today's complex wireless communications systems.

HOW WIRELESS TELEGRAPH WORKS:

Near the end of the 19th century, it was discovered that an electric spark sent out electrical energy which travelled through the air without wires and could be detected at a distant point. This discovery made it possible to communicate without wires.

HOW TO BUILD A SIMPLE WIRELESS TELEGRAPH SET:

The simplest wireless telegraph set consists of a means of generating and controlling a spark which sends out radio waves into the air, and a receiver or detector to detect the radio waves.

Probably the simplest way to generate and control a spark is to use a switch (called a telegraph key) to turn on and off a buzzer which generates sparks.
The simplest way to receive or detect the radio waves generated by the buzzer is to use an AM radio tuned to a place on the dial where there are no other stations.

Here is the simple wireless transmitter which is basically an electrical circuit consisting of 3 parts, all hooked together by a WIRE.

A BATTERY supplies the electricity or voltage.
A KEY is used to complete or break the circuit.
A BUZZER is used to generate the sparks and the radio waves.

The circuit is shown below: (The lines indicate the wires and the arrowheads show the path of the electrical current as it flows through the wires.)


!--->---->---->------ BATTERY ---->---->---->-----!
! (Supplies the voltage) !
KEY BUZZER
(Completes or breaks (Generates sparks
the electric circuit) & radio waves)
! !
!---<----<----<----<----<----<----<----<----<-----!

The WIRES can be virtually any kind of electric wire with the insulation removed from the ends where the connections are made.
The BATTERY can be flashlight or lantern batteries generating about 6-Volts.

The KEY can be any electric switch or a simple piece of metal which can be bent down to make an electrical contact.

The BUZZER can be a door buzzer which can be found in any hardware store. You can also make a buzzer by removing the bell from a doorbell.

Since a buzzer is just an electromagnet which breaks the circuit which is activating it when it is activated, you can make your own buzzer by winding about 100-200 turns of wire around a nail and arranging it so that activating this electromagnet pulls on an armature which opens a set of contacts and breaks the circuit to the electromagnet. As soon as the circuit is broken, a spring returns the armiture to it's original position and the circuit is made again. This cycle of break-the-circuit and make-the-circuit continues and makes the armature vibrate or buzz for as long as a voltage is applied.

After you have built the transmitter, keying the wireless transmitter by closing the switch will send out radio waves. Short key closures are dots and long key closures are dashes. Here is a link to the two types of codes:(2KB)

Here is a picture of a commercially-made key and buzzer telegraph practice set which can also function as a wireless transmitter. Pressing the key causes the buzzer to buzz and create sparks which are broadcast through the air and can be received on an ordinary AM radio. A key and buzzer practice set which can also function as a simple wireless transmitter.

DIFFERENT TYPES OF "DETECTORS"

The simplest detector for your wireless spark transmitter is a common AM radio tuned to a place on the dial where there are no other stations. You will hear a noisy stattic sound every time you press the key. These sounds are exactly like those that people heard during wireless communications one hundred years ago.

CRYSTAL RADIO SETS:

In the early days of wireless, a crystal of galena and a pointed piece of wire called a 'cat's whisker' were brought into contact to make a rudimentary diode detector. This allowed the radio waves to be 'detected' into DC (Direct Current) electricity which could activate earphones or headphones. These early radio sets were called 'crystal radio sets'.

CONSTRUCTION OF A CRYSTAL RADIO SET:

You can make a simple crystal radio detector for your wireless spark transmitter by hooking a wire ANTENNA to a DIODE DETECTOR and a pair of earphones as shown in the following circuit:


--->---->---->---WIRE ANTENNA---->---->---->-----!
(Picks up the radio waves) !
DIODE
DETECTOR
!
!
EARPHONES
!
!
-/-/-/-/-/-/-/-/-/-/-/-/-/-/-/-/-/-
(GROUND: (Bury wire in the ground))

The WIRE should be at least 10 feet long and fairly close to the buzzer.
The DIODE can be almost any diode such as a 1N4001. It doesn't matter which end is hooked up to the antenna.
The EARPHONES can be almost any sensitive headphones.
The GROUND connection should be a wire, buried in the (preferably moist) ground.

Keying your spark transmitter should produce a buzzing sound in the earphones.
If the signal is not strong enough, you might have to attach an antenna wire to the buzzer contact of your spark transmitter and put it near the antenna of your receiver.

After it was discovered around 1900 that messages could be sent by radio waves, the morse code was used to encode those messages. Although voice communications by radio became possible in the 1920's, the morse code continues to be used by amateur radio operators to the present. It was only in the late 1990's that most governments stopped using the code in favor of voice and satellite communications.

The original "Morse code" (Also called the "American Morse Code") was used on the land-lines in this country but a slightly different code called the "Continental" or "International" code was used in Europe and on the radio waves.
Click here for a comparison of the two codes:(2KB)

BUILDING A WORKING TELEGRAPH SYSTEM

If you would like to build a simple working LAND-LINE telegraph set, click on the following link:

How to BUILD a working LAND-LINE telegraph set:(15KB)

----->> ADDITIONS, CORRECTIONS, and COMMENTS ARE WELCOME ! ! ! ! !


Professor Thomas B. Perera
Montclair State University

  • Email Address: (To help me avoid automated 'junk mail' programs,
    I ask you to type my email address as follows with no spaces between words:)

  • PLEASE TYPE: tom

  • THEN TYPE THE @ SYMBOL

  • THEN TYPE: w1tp.com


  • ( Please Inquire Before Sending Attachments Larger Than 100KB ! )

How to build a wind turbine generator

.
View Comments

Savonius Wind Turbine
These plans are for the construction of a machine called a Savonius wind turbine. Wind turbines come in two general types, those whose main turning shaft is horizontal and points into the wind, and those with a vertical shaft that points up. The Savonius is an example of the vertical axis type. It consists of two simple scoops that catch the wind and cause the shaft to turn.

This type of turbine is simple to build, but is not nearly as efficient as a well-designed horizontal axis turbine. The Savonius turbine relies solely on drag to produce the force that turns their shaft. One side of the turbine catches the moving air more than the other, causing the turbine to spin. This design does not allow the turbine to spin faster than the oncoming wind, which makes them a poor choice in areas where winds are light.

A Savonius wind turbine
A Savonius wind turbine.

Horizontal axis turbines are by far the most common kind of wind turbine. They can be seen at several places across Canada and the United States. They are also becoming common in Europe and many other countries around the world. These turbines feature wing-like blades that generate aerodynamic lift as the wind blows past them, causing the central shaft to turn. To operate at peak efficiency, this type of turbine must always face directly into the wind. Many horizontal turbines have a large wind vane that acts like a sail, helping them to stay pointed in the right direction.

Making electricity

A horizontal axis turbine
A horizontal axis turbine.
Courtesy Vision Quest Wind Electric.

We are surrounded by hundreds of appliances that use electricity to do work. But what is electricity? Basically, electricity is a flow of electrons in a metal wire, or some other conductor. Electrons are tiny particles found inside atoms, one of the basic building blocks of all matter. We call the flow of electrons through any conductor a "current of electricity."

Each electron carries a tiny negative charge. When they move through a conductor, they produce an invisible field of magnetic force, similar to that found around a magnet. The strength of that field depends on how many electrons are in motion. You can concentrate this field by winding the wire in which the electrons move into a tight coil with many turns. This causes many more electrons to be in motion in a small space, resulting in a stronger field. If you then place a piece of iron in the middle of the coil, the electromagnetic field will turn the iron into a powerful magnet.

While it is true that electrons moving through a conductor produce a magnetic field, the reverse is also true. You can make electrons move in a wire by "pushing" them with a moving magnet. This is in fact how an electrical generator works. Electrical generators usually contain powerful magnets that rotate very close to dense coils of insulated wire. The coils develop a flow of electrons that becomes an electrical current when the generator is connected to an electric circuit.

You will be building an electrical generator as part of this project. It uses moving magnets to create a current of electricity in coils of wire. This generator is technically called an alternator because the electrons move back and forth in the wire, rather than flowing in just one direction as they do from a battery. A meter connected to the wire would show that the charge of the wire switches or alternates between positive and negative as the electrons change directions. Such an electrical current is called alternating current or AC. Household electrical current is alternating current. Appliances have to be specially designed to use it. The other type of current is called direct current, because the electrons move in one direction only. Most battery-powered appliances such as calculators and portable CD players use direct current.

Safety Precautions

  • Utility knives and scissors can be dangerous! Use caution when cutting materials using them. The blades of most utility knives can be extended and locked in place. Extend the blades only far enough to cut all the way through the material, no farther. Be sure they are locked in position while cutting.

  • For a safe and easy cutting make sure the blades of your utility knives are always sharp (ask your teacher for assistance in breaking off dull blades)

  • Hot glue guns can cause serious burns, as can the glue if it comes in contact with your skin.

  • The magnets you will be using can cause serious damage to computers or other electronic devices. Be sure to keep them away from credit cards, computer disks, audio tapes, or any other materials on which information is stored magnetically.

Build It!

(Click to continue to the construction plans)

Test It!

  1. Set the selector on the digital volt meter to read Volts AC. At this setting, the meter will detect the number of volts of alternating current your turbine produces.
    Photo of voltmeter hooked up to turbine
    The Pembina Institute

  2. Attach the test clips on the volt meter to the wire leads on your turbine.

  3. Blow on your turbine to cause it to spin. Have a partner watch the readings on the display of the meter. Record your results. A well-assembled wind turbine should be able to produce between 1 and two volts by blowing on it. A more consistent way to test your turbine is to use a stream of air from an appliance such as a blow dryer (set for COOL) or a vacuum cleaner with the hose plugged into the discharge end. Measure the voltage of your turbine and compare with others.

  4. You may make small modifications to improve the efficiency of your turbine. Look for sources of friction that might slow down its rotation, or find ways to bring the coils closer to the spinning magnets.

How to build a simple electric generator

.
View Comments

Ultra-simple Electric Generator

(c)1996 William Beaty

PARTS:
  • 4 - 1cm x 2cm x 5cm ceramic magnet, Radio Shack #64-1877 $3.96 for 4
  • 1 - #30 Magnet wire 200ft, Radio Shack spools #278-1345 $3.99
  • 1 - Miniature Incandescent Lamp, 1.5V 25mA Rad. Sh. #272-1139 $1.29
  • 1 - Cardboard strip, 8cm x 30cm
  • 1 - Large nail, 8cm long or more
  • Misc. - Knife or sandpaper to strip the wires
  • Misc. - tape to hold wire down
  • Optional: hand drill or electric drill to spin it (hand drill is best)
This is an AC electric generator which is capable of lighting up a tiny incandescent light bulb. The generator is made up of a hollow-ended cardboard box with a nail through the center, many turns of copper wire wound around the box, and four larger magnets clamped around the nail. When the nail and magnets are spun fast by hand, the little light bulb lights up dimly.

I wrote this article because I found lots of projects for making a simple electric motor, but nobody gave the secret for making a generator. Well, here it is: use strong magnets, lots of fine wire, and a special light bulb which only needs 1/2 volt. Also, don't bother making a "commutator", just hook the wires directly to the bulb. It's much simpler that way but the generator will produce AC (alternating current).

INDEX:

CONSTRUCTION

First make the hollow-ended box. Score the cardboard strip like so:
   ___________________________________________________________________
| 8cm | 3.5cm | 8cm | 3cm | 7.5cm |
| | | | | |
| | | | | |
| | | | | |
|8 | | | | |
|cm | | | | |
| | | | | |
| | | | | |
| | | | | |
| | | | | |
|________________|________|_________________|_______|_______________|


NOTE: this page must be displayed in COURIER FONT, otherwise these
pictures will be wrecked and unreadable. Most browsers do this
automatically.


_____8_________
_|______________ \
|\ 7.5 | \ 3.5
|3\ | \
| \_____________|___\
| | 8 |
| | |
| | |
| | | Fold it like this and tape
| | | it securely.
| | |
| | |
| | |
| | |
\ | |
\|__________________|


_______________
_|______________ \
|\ | \
| \ | \
| \_____________|___\
| | | Use the nail to poke a hole perfectly
| | | straight through the center of the
| | | box, going through both sides and all
| | (hole) | three layers of cardboard. Then pull
| | | the nail out and use it to widen all
| | O | the holes slightly, so when you put
| | | the nail back through, it will be a
| | | bit loose and able to spin.
| | |
\ | |
\|__________________|


At this point you should clamp your four magnets around the nail and give
it a spin. This makes sure the box is large enough. The nail and
magnets should spin freely. The corners of the magnets should NOT bump
the inside of the box as they spin. If the box is a bit too small, start
over and make it a little bigger. Either that, or try a thinner nail.

[YES, you can build a plexiglas box instead if you wish. However,
don't make it any larger than this. You want the wire to stay
very close to the spinning magnets, so keep the box as small
as possible.]


Pick the spool of number-30 magnet wire from
_______________ the kit of spools. This is the thinnest.
_|______________ \ Tape one end of the number-30 magnet wire
|\ | \ to the side of the box, then wind all of
| \ | \ the wire onto the box as shown. It's OK
| \_____________|___\ to cover up the nail hole. Pull the taped
| | | end of the wire out, then tape down both
\ | | of the wires so the coil doesn't unwind.
\\ | | You should have about 10cm of wire left
\\\====================| sticking out.
\\\====================/___
|\\====================/ \
-----+-\====================/ \
/ | ==================== \
/ | | | \ Use sandpaper or the edge of a
| \ | | | knife to scrape the thin plastic
| \|__________________| | coating off 2cm of the wire ends.
| Remove every bit of red coating,
so the wire ends are coppery.

(note: the five lines of wire shown above are not real, that's the
'equals signs' I used to draw with. The real wire can just be wound
up in a big wad in the center of the cardboard box.)

_______________
_|______________ \
|\ | \
| \ | \
| \_____________|___\ Spread the wire away from the
| | | nail hole and tape it in place.
\ | | Stick the nail back through the
\\ | | holes and make sure it can spin.
\\\====================| Take your four magnets, stick
\\\========---=========/___ them face to face in two pairs,
|\\========(\\)========/ \ Then stick the two pairs inside
-----+-\==========(_)=======/ \ the box and on either side of the
/ | ==================== | nail so they grab the nail. Push
/ | | | | them around until they are some-
\ | | | what balanced and even, then spin
\|__________________| | the nail and see if they turn
freely. If you wish, you can
stick 2cm squares of cardboard
between the magnets to straighten
them, and tape the magnets so they
don't move around on the nail.


_____ magnets
|_____| _____________
|_____| |_____________| 2 magnets
=================|| NAIL |_____________|
|_____| ______O______
|_____| |_____________| 2 magnets
|_____________|
SIDE VIEW OF THE
NAIL AND MAGNETS VIEW FROM THE END

TWIST THE WIRES TOGETHER

Make sure that each end of the generator's wires are totally cleared of red plastic coating. If there is a bit of plastic left, it can act as an insulator which turns off your light bulb circuit.

Twist the scraped end of each generator wire securely around the silver tip of each wire from the small light bulb. (If necessary, use a knife to strip more plastic from the ends of the light bulb wires.) One generator wire goes to one light bulb wire, the other generator wire goes to the other light bulb wire, and the two twisted wire connections should not touch together. In the twisted wires, metal must touch metal with no plastic in between.

           _______________
_|______________ \
|\ | \
| \ | \
| \_____________|___\
| | |
\ | |
\\ | |
\\\====================|
\\\========---=========/___
|\\========(\\)========/ \
-----+-\==========(_)=======/ \
/ | ==================== |
| | | | |
| \ | | |
| \|__________________| |
| |
\ /
\ twist /
\ {} twist {} /
\ {} {} /
\____/\______ _______/\__/
\_/
( )
( ) tiny
(_) light bulb


TEST IT

Spin the magnet REALLY fast and the bulb will light dimly. If it doesn't work, try spinning it in a dark room so you don't miss the dim glow. If needed, adjust the position of the magnets so they don't hit or scrape the cardboard. This thing has to spin *fast*, and if the magnets whack the cardboard and slow down, you won't see any light. (IF IT DOESN'T WORK, SEE "DEBUGGING" BELOW)

Once you get it to work, try clamping the point of the nail into the chuck of a hand-crank drill. Spin the magnets fast with the drill and the bulb will light brightly. Don't go too fast or you'll burn out the bulb, or maybe fling magnets all over the room. You can try this with an electric drill as well, although electric drills don't spin as fast.

Note: your generator produces Alternating Current, not Direct Current. The output voltage is about 2 volts max, so there is no electric shock hazard at all.


MORE PROJECTS | EVEN MORE PROJECTS | | MY ELECTRICITY EXPLANATIONS


HOW IT WORKS

All metals contain a movable substance called "electric charge". Even uncharged wires are full of charge! After all, the atoms of the metal are made half of positive protons and half of negative electrons. Metals are special because their electrons don't stay connected to the metal atoms, instead they fly around inside the metal and form a type of electric "liquid" inside the wires. All wires are full of electric fluid. Modern scientists call this the "electron sea" or "electron gas." It is not invisible, it actually gives metals their silvery shine. The electron gas is like a silvery fluid. Sort of.

When a circle of wire surrounds a magnetic field, and the magnetic field then changes, a circular "pressure" called Voltage appears. This circular voltage trys to force the movable charges in the wire to rotate around the circle. In other words, moving magnets create electric currents in closed circles of wire. A moving magnet causes a pumping action. If the circuit is not complete, if there is a break, then the pumping force will cause no charge flow. But if the circuit is "complete" or "closed", then the magnet's pumping action can force the electrons of the coil to begin flowing. This is a basic law of physics, and it is used by all coil/magnet electric generators.

When the circuit is closed and the magnet is moving, charges in the metal are forced to flow. The charges of the light bulb's filament are pushed along. When the charges within the copper wire pass into the thin light bulb filament, their speed greatly increases. When the charges leave the filament and move back into the larger copper wire, they slow down again. Inside the narrow filament, the fast-moving charges heat the metal by a sort of electrical "friction". The metal filament gets so hot that it glows. The moving charges also heat the wires of the generator a bit, but since the generator wires are so much thicker, almost all of the heating takes place in the light bulb filament.


OTHER THINGS TO TRY

Disconnect one wire from the light bulb. Spin the magnet. While still spinning the magnet, have a friend touch the wires together so the bulb lights up again. Is the nail still easy to spin? Keep spinning the magnet while your friend connects and disconnects the bulb. Feel any differences in how hard you must spin the nail? Also try spinning the magnets while your friend connects the generator wires directly together (with no bulb connected.)

SO WHAT?

When you crank the generator and make the lightbulb turn on, you are working against electrical friction in order to create the heat and light. You can FEEL the work you perform, because whenever you connect the bulb, it suddenly gets harder to crank the generator. When you disconnect the bulb, it gets easier.

Think of it like this. If you rub your hands together lightly, the skin stays cool, but if you rub your hands together hard, your skin gets hot. It takes more effort to rub skin hard so that it heats up; it takes work. And in a similar way, it's hard to heat the lightbulb filament, it takes work. You twist the generator shaft, the generator pushes the wire's charge through the tiny filament, and if you don't keep spinning the magnet, the magnet will be slowed quickly.


FEEL THE ELECTRONS

When your hand spins the magnet, you can feel the extra work it takes to light the bulb. This happens because your hand is connected to the flowing charge in the bulb, and when you push on it, you can feel it push back on you! How is your hand connected to the flowing charges? Your hand twists the nail, the nail spins the magnet, the magnet pushes the invisible magnetic fields, the fields push the movable charges, the charges flow slowly through the light bulb filament, and the tiny filament causes friction against the flow of charge and heats up. But then the reverse happens! The charge can't move much because of the tiny filament, so it resists the pressure from the magnetic fields, which in turn resist the pressure from the magnet, which resists the twisting pressure from the nail, which resists the twisting pressure from your fingers. So, in a very real way, you can FEEL the electrons in the light bulb filament. When you push them, you can FEEL their reluctance to move through the narrow filament!


TURN OFF THE FIELD

Try changing the magnets' position. Remove the magnets, then tape them around the nail so that the two stacks are clinging side by side, rather than stacked up in a line. Spin the magnets. Does the light bulb still light up? No. This happens because The N pole of one magnet stack is very close to the S pole of the other, and vice versa. The magnetic field is now stretching between the two stacks of magnets, and isn't spreading outward. Most of the field is trapped between the adjacent magnet poles, so the field doesn't extend out through the coil. On the other hand, when you make a single stack of magnets instead, the field extends outwards for many inches, and if you spin the single magnet stack, the field cuts through the wires and pumps their electrons into motion.


MOTOR CHALLENGE!

There is a simple way to convert your generator into a motor. It involves using paint or tape to insulate a spot on one side of the nail, then using a 6V battery and using the generator's wires, touching the nail to form a switch. The rotating magnets turn the nail, which turns the coil on and off at just the right times. Can you discover the trick?

MAKING DC

You can change this generator so it makes DC rather than AC. The voltage is still very low, so it's not very useful. If spun very fast, you might be able to recharge a tiny 1.2v rechargeable battery. (Maybe you could add lots more turns of wire to the coil to increase the voltage?)

Converting to DC, the hard way: add a spinning "commutator" switch and sliding metal "brushes," so that each time the magnets turn half way, the switch reverses the generator connections. There is an easier way: Add a one-way valve! An "electricity valve" is called a diode or rectifier. If you connect a diode in series with one of your motor wires, it will only let the charges flow in one direction. It will change the Alternating Current into one-way flow (called "pulsating direct current.) Try diodes from Radio Shack such as 1N4000 or 1N4001. Unfortunately it takes about 3/4 volts to force charges through a diode, and this voltage subtracts from your generator output. Try using a special diode with lower voltage, such as 1N5819 from digikey.com.


MAGNET WARNING

WARNING: Keep the magnets away from computers, disks, videotapes, color TV sets, and wallets and purses containing credit cards. Try this: Keep the generator far from your color TV, turn on the TV, start spinning the nail so the magnet is spinning fast, then bring the generator about 2ft away from the TV screen. DON'T BRING IT CLOSER!!! Keep spinning the magnets, and you'll see a cool wobbling effect in the TV picture, along with some color changes. The field from the magnet is bending the electron beam that paints the picture on the screen. Be careful, if you bring the magnet about 15cm away, the iron sheet inside the TV picture tube will become magnetized and the distorted colors will be permanent.


DEBUGGING

SPIN IT FAST, IN THE DARK. Sometimes your generator is working fine, but you're not spinning it fast enough. Or perhaps the dim glow of the light bulb is being missed in a brightly lit room. So, go into semi-darkness. Then spin the thing REALLY FAST. Try cranking it with an old-fashioned drill. Or try sticking a little wheel on the nail, then rub it on the spinning tire of an upside-down bicycle (don't go too fast or the bulb will burn out.)

DON'T USE DIFFERENT PARTS. This generator cannot power a normal flashlight bulb, it needs the special 25-milliamp, 1.5-volt bulb sold by Radio Shack. Don't use a normal flashlight bulb, since that kind of bulb requires way more energy before it starts to glow. If you simply cannot find the Radio Shack 25mA bulb, you can use a 1.5V 40mA bulb, but add twice as much magnet wire to your coil (buy two of those kits of magnet wire.)

DON'T USE OTHER MAGNETS, use the large Radio Shack large rectangular magnets. They cost about $1 each, and have no holes through the center. Most other magnets are way too weak and will not work unless you spin the magnets incredibly fast, at thousands of RPM (revolutions per minute.)

If the generator refuses to work, inspect the spot where the wires twist together. The generator coil has a very thin red plastic coating, and you must clean ALL of this coating off the wire ends before twisting them to the light bulb wires. Also, the tips of the light bulb wires must be stripped clean of plastic. The metal wires must touch together. If there is plastic between the metal of the generator wire and the light bulb wire, the circuit will be "open" and no charge will flow.

Make sure the magnets are positioned correctly. Do this: stack up all four magnets so their widest faces are clinging together. Then jam the nail through the crack in the middle of the stack. Then take this apart, and re-assemble it inside the generator in the same way.

Be sure to follow the instructions and diagrams. You MUST wind the coil so the coil goes across the side of the box which has the nail hole. If you wind it so no coil is crossing the nail-hole side of the box, then the magnetic fields won't cut across the wires, and no electric voltage will be created.

Also, don't wind the coil over the open end of the box, otherwise you won't be able to get your fingers inside to make changes to the magnet.

If you cannot spin the magnets fast enough with your fingers, try a "twist drill" or hand-crank drill. Clamp the nail in the end of the drill and spin the magnets as fast as you can. An electric drill may work too, but most electric drills don't move as fast as the hand-cranked type.

DON'T SUBSTITUTE THE MAGNETS OR THE LIGHT BULB WITH A DIFFERENT TYPE. It needs strong magnets and a low-voltage, low-current incandescent bulb. If your generator doesn't work, check the parts again and make sure you have the right type of magnets and the right type of light bulb. Don't use fewer magnets. Weaker magnets may work in theory, but you won't be able to spin them fast enough by hand, and a high speed motor will be required in order to spin them. Don't use an LED. A red LED could work in theory, but you need at least 1-1/2 volts to barely light one up (the green or blue kind need even higher volts.) The light bulb is better because it lights up at less than 1/2 volt. (If you really must light up an LED, use the red kind, and also add about three more spools of #30 wire to your generator coil.)

Perhaps your luck is bad and you got a dead light bulb. To test it, get any new, fresh 1.5V battery, take the bulb off the generator, then touch one wire to the top of the battery and one wire to the bottom. The light bulb should light brightly. If it stays dark, the bulb is bad.

The generator can be improved by using more turns of wire. You used only the spool of #30 wire. With more wire, the magnets don't have to spin as fast to light the bulb. Connect the thinnest of the remaining spools of wire to the wire that's there, making sure to scrape the wire ends totally clean before twisting them together. Make sure to wind the extra wire in the same direction as the rest of the coil.

Or, if you want to light your light bulb REALLY bright, buy a second kit of wire, hook the second #30 spool to the coil you have already made, then wind all the wire onto the coil. Be sure to clean all the red plastic off the ends of the extra wire you've added.